Have you ever wondered what it takes to pursue your academic dreams in the United States? The F-1 visa is the primary pathway for international students to achieve this goal. With new updates for 2025, understanding the process has never been more important.
This visa allows you to enroll in SEVP-certified institutions, ensuring your education aligns with U.S. standards. Recent changes include increased visa interview availability and enhanced social media screening. Staying informed is key to navigating these updates smoothly.
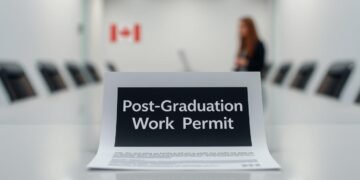
One of the most critical documents is Form I-20, which maintains your legal status and employment eligibility. After graduation, you’ll have a 60-day grace period to explore OPT or CPT opportunities. These programs provide valuable work experience in your field of study.
Key Takeaways
- The F-1 visa is essential for international students in the United States.
- 2025 updates include more visa interview slots and social media checks.
- SEVP certification ensures your institution meets U.S. standards.
- Form I-20 is crucial for maintaining legal status.
- OPT and CPT programs offer work opportunities post-graduation.
Introduction to the F-1 Visa
The F-1 visa opens doors for academic pursuits in a globally recognized education system. This non-immigrant visa is designed for individuals enrolled in full-time academic programs or language training courses. It allows access to SEVP-certified institutions, ensuring high educational standards.
What is an F-1 Visa?
The F-1 visa is a non-immigrant student visa for those pursuing academic programs or language training. It requires full-time enrollment, typically a minimum of 12 credits per semester. This visa is essential for accessing accredited institutions and maintaining legal status during your stay.
Who is Eligible for an F-1 Visa?
Eligibility for the F-1 visa includes admission to a SEVP-certified school, proof of financial stability, and English proficiency. Applicants must also demonstrate ties to their home country and provide a valid passport with a six-month buffer post-program. Key documents include the form i-20, SEVIS fee payment confirmation, and accurate program dates.
Starting in 2025, applicants must provide public social media profiles during visa interviews. Off-campus work is prohibited without OPT or CPT authorization, ensuring compliance with visa regulations.
Understanding the F-1 Visa Process
Navigating the F-1 visa process can seem complex, but breaking it into steps makes it manageable. Each stage is crucial for ensuring a smooth transition into your academic journey. Below, we’ll walk you through the key steps to secure your visa.
Step 1: Acceptance to a SEVP-Certified Institution
The first step is gaining admission to a SEVP-certified institution. These schools meet strict U.S. government standards, ensuring quality education. Students must verify their chosen institution’s certification through the ICE database. This step is essential for maintaining legal status.
Step 2: Obtaining Form I-20
Once accepted, your institution will issue the Form I-20. This document contains your SEVIS ID, program dates, and funding details. It typically takes 2-3 weeks to receive after submitting verified financial documents. Double-check for errors like name mismatches or missing signatures to avoid delays.
Step 3: Paying the SEVIS Fee
The next step is paying the SEVIS fee, which is $350. This fee is mandatory and can be paid online via FMJfee.com. Retain the payment receipt, as it’s required for your visa application. Early payment allows you to schedule your visa interview up to 120 days in advance.
By following these steps, you’ll be well-prepared to navigate the F-1 visa process. Staying organized and attentive to details ensures a seamless experience.
How to Apply for an F-1 Visa
Applying for an F-1 visa involves a structured process that requires attention to detail. From completing forms to attending an interview, each step is crucial for success. Here’s a breakdown of what you need to know.
Completing the DS-160 Form
The first step in your visa application is filling out the DS-160 form. This online form collects personal details, travel history, and U.S. contact information. Ensure your digital photo meets the requirements: 2×2 inches, white background, and a neutral expression. Double-check all entries to avoid delays.
Scheduling Your Visa Interview
Once the DS-160 is submitted, you can schedule your interview at the nearest embassy consulate. Wait times vary by country, so plan ahead. You can book your appointment up to six months in advance. Choose the embassy that aligns with your jurisdiction to avoid complications.
Preparing for the Visa Interview
Gather all required documents, including your original I-20, financial proofs, and admission letter. Practice with mock interviews to build confidence. Shorelight advisors can help you prepare effectively. Arrive early on the interview day and bring all necessary paperwork.
F-1 Visa Interview: What to Expect
Preparing for your visa interview can feel overwhelming, but knowing what to expect can ease the process. This step is crucial for securing your student visa and demonstrating your readiness for academic pursuits. Understanding the format and common questions will help you approach the interview with confidence.
Common F-1 Visa Interview Questions
During the interview, you’ll likely be asked about your choice of university, post-graduation plans, and funding sources. Be prepared to explain why you selected your institution and how it aligns with your career goals. Vague answers or unclear intentions can raise red flags.
Other common questions include your ties to your home country and your academic background. Provide concise, truthful answers and avoid oversharing. Practice mock interviews to refine your responses and build confidence.
Tips for a Successful Visa Interview
Organization is key. Bring all required documents, including your Form I-20, financial proofs, and admission letter. Arrive early and dress professionally to make a positive impression. Stay calm and composed, even if you feel nervous.
Be honest and consistent in your answers. Avoid mentioning family ties in the U.S. or vague career goals, as these can be red flags. If denied under Section 214(b), explore reapplication strategies or waiver eligibility checks.
After approval, pay the visa issuance fee and monitor your passport return timelines. Following these tips will increase your chances of a successful visa interview and smooth transition into your academic journey.
F-1 Visa Requirements in 2025
Meeting the F-1 visa requirements in 2025 involves understanding updated policies and preparing thoroughly. Recent changes emphasize stricter documentation and enhanced verification processes. Staying informed ensures a smooth application experience.
Institution Certification
All institutions must be SEVP-certified, ensuring they meet U.S. government standards. The recertification process occurs every two years, maintaining quality education for international students. Verify your school’s certification through the ICE database to avoid complications.
Full-Time Enrollment
Full-time enrollment is mandatory, typically requiring a minimum of 12 credits per semester. Exceptions include medical Reduced Course Load (RCL), final semester, or academic difficulty. Always consult your Designated School Official (DSO) for approval before reducing your course load.
English Language Proficiency
Proficiency in the English language is essential for academic success. Most institutions require a minimum TOEFL score, which varies by school. Conditional admission options, such as language bridge programs, are available for those needing additional support.
By understanding these requirements, you can prepare effectively for your F-1 visa application. Stay updated on 2025 changes, including increased financial documentation scrutiny and accreditation checks through the CHEA database.
Financial Requirements for the F-1 Visa
Understanding the financial obligations for your student visa is crucial for a smooth application process. Demonstrating sufficient funds ensures you can cover tuition, living expenses, and other costs during your stay. Proper documentation is key to meeting these requirements.
Proof of Sufficient Funds
Applicants must provide evidence of financial stability to support their education and living expenses. Acceptable proofs include bank statements, scholarship letters, and sponsor affidavits. Funds must cover at least one year of expenses, with a recommended buffer for additional months.
Sponsors must submit notarized letters, tax returns, and employment verification. For foreign accounts, currency conversion standards apply. Note that cryptocurrency holdings are not accepted as proof starting in 2025.
Financial Documentation Checklist
To avoid delays, students must prepare a comprehensive financial documentation package. Here’s what to include:
- Liquid assets covering tuition and living costs for 1.5 years.
- Sponsor documentation, such as notarized letters and tax returns.
- Currency conversion details for foreign accounts.
- Scholarship or financial aid letters, if applicable.
Double-check all documents for accuracy and completeness. Errors can lead to delays or denials. Make sure your financial proofs align with the latest 2025 updates to avoid complications.
Maintaining F-1 Visa Status
Keeping your student visa valid requires meeting specific rules and staying organized. Compliance ensures you can focus on your academic goals without interruptions. Here’s what you need to know to maintain your status.
Full-Time Enrollment Requirements
To stay compliant, you must enroll in a minimum of 12 credits per semester. Online classes are allowed, but only up to 3 credits count toward full-time enrollment. Exceptions include medical issues, final semester, or academic challenges, but you must consult your Designated School Official (DSO) first.
Reporting Changes to Your DSO
As an international student, you must report any major changes to your DSO. This includes address updates within 10 days, program transfers, or OPT applications. Failure to report changes can lead to SEVIS termination, which jeopardizes your status.
SEVIS termination can also occur due to unauthorized employment or a GPA below 2.0. If terminated, you may apply for reinstatement using Form I-539, which costs $370. Ensure you meet all requirements before submitting the form.
Health insurance is another critical requirement. Coverage must include at least $100,000 in benefits and repatriation services. Staying informed and proactive helps you maintain your visa and focus on your education.
Working on an F-1 Visa
Balancing academics and work opportunities is a key aspect of the student experience. For those on an F-1 visa, there are specific rules and programs that allow you to gain valuable work experience while maintaining your status. Understanding these options can help you make the most of your time in the U.S.
On-Campus Employment
On-campus jobs are a great way to earn extra income while staying focused on your studies. Students can work up to 20 hours per week during the academic term and full-time during breaks. Common positions include teaching assistantships, dining services, and bookstore roles. These jobs are often flexible and tailored to fit your academic schedule.
Curricular Practical Training (CPT)
CPT allows you to gain hands-on experience in your field of study through paid internships or co-op programs. To qualify, you must be enrolled in a course that requires practical training as part of the curriculum. Authorization is granted by your Designated School Official (DSO), and you must maintain full-time enrollment during the program.
Optional Practical Training (OPT)
OPT provides an opportunity to work in your field before or after completing your degree. You can apply for pre-completion OPT while still in school or post-completion OPT after graduation. The application window opens 90 days before your program end date. STEM graduates may also qualify for a 24-month extension if employed by an E-Verify employer.
To start working, you’ll need an Employment Authorization Document (EAD) card. Once approved, you can apply for a Social Security number, which is essential for payroll and tax purposes. By leveraging these programs, you can enhance your skills and build a strong foundation for your career.
Understanding OPT and CPT
Exploring work opportunities while studying can significantly enhance your academic and professional journey. Two key programs, Curricular Practical Training (CPT) and Optional Practical Training (OPT), allow you to gain hands-on experience in your field. These programs are designed to complement your education and prepare you for a successful career.
What is CPT?
CPT is a program that lets you work in your field of study while still enrolled in your academic program. It’s often required as part of your curriculum, such as internships or co-op roles. You can work part-time (up to 20 hours per week) during the academic term or full-time during breaks. Note that full-time CPT exceeding 12 months can affect your OPT eligibility.
What is OPT?
OPT provides an opportunity to work in your field before or after completion of your degree. You can apply for pre-completion OPT while still in school or post-completion OPT after graduation. The application window opens 90 days before your program ends. Once approved, you’ll receive an Employment Authorization Document (EAD) card to start working.
STEM OPT Extension
For students in STEM fields, there’s an additional 24-month extension available. To qualify, you must work for an E-Verify employer and meet specific documentation requirements, such as mentorship plans and wage standards. Unemployment limits are stricter for STEM OPT, with a maximum of 150 days allowed compared to 90 days for standard OPT.
Employers must also report your employment details through the SEVP Portal. Staying informed about these rules ensures you maximize your practical training opportunities and maintain compliance with visa regulations.
Traveling on an F-1 Visa
Traveling while on a student visa requires careful planning and preparation. Whether you’re visiting home or exploring new destinations, understanding the rules ensures a smooth experience. Here’s what you need to know about staying compliant during your trips.
Travel Signatures on Form I-20
Before traveling, ensure your Form I-20 has a valid travel signature from your Designated School Official (DSO). Signatures are valid for 12 months, or 6 months if you’re on OPT. Without this, you may face delays or denial of entry. Always double-check the signature’s expiration date before your trip.

Re-Entering the U.S. After Travel
When returning to the U.S., your passport must be valid for at least six months beyond your re-entry date. Carry copies of your transcripts, enrollment verification, and recent bank statements to prepare for secondary screening. If traveling to Canada or Mexico, you may qualify for automatic visa revalidation, allowing re-entry without a new visa.
For those renewing their visa during home visits, check if you’re eligible for the Dropbox program. This streamlined process can save time and effort. Always print your I-901 fee receipt and carry it with your travel documents to ensure compliance with Customs and Border Protection (CBP) requirements.
If you’re on OPT, bring your job offer letter as proof of employment. Staying organized and informed helps you avoid complications and enjoy your travels stress-free.
F-1 Visa Denials: What to Do Next
Facing a visa denial can be discouraging, but understanding the reasons and next steps can help you move forward. Many applicants encounter challenges, with 214(b) denials accounting for nearly 40% of rejections. Knowing how to address these issues can improve your chances in future attempts.
Common Reasons for F-1 Visa Denials
Several factors can lead to a visa denial. Insufficient ties to your home country is a top reason, as consular officers need assurance you’ll return after your program. Inconsistent answers during the interview or gaps in your documentation can also raise red flags.
Another common issue is unclear financial proof. If your application lacks detailed evidence of funds, it may be denied. Double-check all documents before submission to avoid these pitfalls.
How to Reapply After a Denial
If your visa is denied, don’t lose hope. Start by reviewing the refusal points provided by the consular officer. Address these issues directly in your reapplication. For example, strengthen your ties to your home country with updated evidence like property ownership or job offers.
Consider seeking legal consultation from experts like F1 Visa Advisors. They can review your case and suggest improvements. Administrative processing typically takes 60-90 days, so plan your time accordingly.
Finally, avoid “visa shopping” by reapplying at the same consulate unless your circumstances have significantly changed. A well-prepared reapplication can turn a denial into an approval.
Extending Your F-1 Visa
Extending your stay as an international student requires careful planning and timely action. Whether due to academic delays, medical issues, or other valid reasons, extending your visa ensures you can complete your program without interruptions. Understanding the process and requirements is key to maintaining your legal status.
When to Apply for an Extension
It’s essential to apply for an extension before your current visa expires. Common reasons include medical issues, research delays, or academic probation. Start the process at least 3-5 months in advance, as USCIS processing times can vary. Ensure your date of extension aligns with your academic needs to avoid complications.
How to Apply for an Extension
To apply, you’ll need an updated Form I-20 from your Designated School Official (DSO). Submit new financial proofs and academic progress reports to demonstrate your eligibility. For those transitioning from a B-1/B-2 visa, a change of status application is required. Additionally, cap-gap extensions are available for H-1B petitioners to bridge the gap between visa categories.
Transferring your SEVIS record differs from extending your visa. A transfer is necessary if you’re changing schools, while an extension applies to continuing at the same institution. Stay proactive and consult your DSO to ensure a smooth process.
Transferring Schools on an F-1 Visa
Transferring to a new institution can be a smooth process with proper planning. Whether you’re switching for academic reasons or personal preferences, maintaining your visa status is crucial. Understanding the steps involved ensures a seamless transition.
How to Transfer Your SEVIS Record
To transfer your SEVIS record, you must first gain full admission to the new school. Your current Designated School Official (DSO) will coordinate the release date with the new institution. Ensure your SEVIS status is active and meets the same academic level requirement.
During the transfer process, you cannot attend classes at either institution. This interim period requires careful planning to avoid gaps in your academic progress. Graduate students should also check GPA transfer requirements to ensure eligibility at the new school.
What to Do After Transferring
Once the transfer is complete, report to your new DSO within 15 days. They will update your SEVIS record and confirm your enrollment. If you were employed on-campus at your previous institution, check with your new DSO about employment continuity rules.
By following these steps, you can maintain your status as an international student and focus on your academic goals. Staying organized and proactive ensures a successful transfer experience.
Grace Periods and Departure
After completing your academic program, understanding the grace period is essential. This transition phase allows you to organize your next steps while maintaining your legal status. Proper planning ensures a smooth departure and avoids complications.
60-Day Grace Period After Program Completion
You have 60 days after your program ends to prepare for departure. During this time, you can finalize travel plans, apply for OPT, or explore other opportunities. However, job searches are limited, and unauthorized work can lead to SEVIS termination.
Ensure your SEVIS record remains active during this period. Overstaying beyond the grace period can result in severe consequences, including 3 or 10-year bars from re-entering the U.S. Stay informed about your I-94 record and verify its accuracy.
What to Do Before Leaving the U.S.
Before departing, complete a thorough checklist. Close your SEVIS record with your Designated School Official (DSO) to avoid future issues. Ensure tax compliance by filing necessary forms, especially if you worked during your stay.
Consider enrolling in your institution’s alumni network to stay connected. This can provide valuable resources and networking opportunities in your home country. By following these steps, you can leave the U.S. with confidence and a clear plan for the future.
Resources for F-1 Students
Accessing the right resources can make your academic journey smoother and more successful. Whether you’re navigating visa requirements or adjusting to campus life, knowing where to find reliable information is essential. This section highlights key tools and support systems available to help you thrive.

SEVP Resources
The Student and Exchange Visitor Program (SEVP) offers a wealth of resources to guide you through the process. The SEVIS Help Hub provides contact options for resolving technical issues or answering questions. Additionally, the ICE.gov/SEVP website is a central hub for updates, forms, and guidelines.
Designated School Officials (DSOs) are also a critical resource. They can assist with scheduling appointments, updating your SEVIS record, and ensuring compliance with visa regulations. Always keep their contact details handy for quick access.
International Student Offices
Your school’s international student office is a valuable support system. These offices often host cultural adaptation workshops, legal clinics, and orientation programs to help you adjust. They can also provide guidance on employment opportunities, tax compliance, and travel requirements.
Many campuses offer 24/7 hotlines for emergencies, ensuring you have access to help whenever needed. Building a relationship with your office staff can make your experience more seamless and enjoyable.
- Key websites: ICE.gov/SEVP, EducationUSA
- Campus resources: Legal clinics, cultural adaptation workshops
- Government apps: CBP One, SEVP Portal
- Emergency contacts: 24/7 DSO hotlines
- Record-keeping best practices: Maintain copies of all important documents
Conclusion
Navigating the student visa process successfully requires careful planning and attention to detail. Key deadlines, such as SEVIS payments and OPT applications, must be met to ensure compliance. Staying enrolled full-time and reporting changes promptly are essential for maintaining your status.
Prepared applicants have an 85% approval rate, showcasing the importance of thorough preparation. For personalized guidance, Shorelight advisors are available to assist with your journey. Their expertise can help you navigate complex requirements with confidence.
Before finalizing your plans, ensure you have all necessary documents. This includes copies of your I-20, SEVIS receipts, and emergency contacts. Staying organized and informed will help you make the most of your experience in the united states.
FAQ
What is an F-1 visa?
An F-1 visa is a non-immigrant visa for international students to attend a SEVP-certified institution in the United States. It allows you to pursue academic studies or language training programs.
Who is eligible for an F-1 visa?
You are eligible if you are accepted into a SEVP-approved school, can prove sufficient financial support, and intend to return to your home country after completing your program.
How do I obtain Form I-20?
After being accepted by a SEVP-certified institution, the school will issue Form I-20, which is required for your visa application and SEVIS fee payment.
What is the SEVIS fee, and how do I pay it?
The SEVIS fee is a mandatory payment to activate your SEVIS record. You can pay it online using a credit card or other accepted payment methods.
How do I complete the DS-160 form?
The DS-160 is an online application form for non-immigrant visas. Fill it out accurately, upload a photo, and submit it to receive a confirmation page for your visa interview.
What should I bring to my visa interview?
Bring your passport, Form I-20, DS-160 confirmation page, SEVIS fee receipt, financial documents, and any additional proof of ties to your home country.
What are common F-1 visa interview questions?
Questions often focus on your study plans, financial situation, ties to your home country, and intent to return after completing your program.
What is the difference between CPT and OPT?
CPT allows you to work during your studies in a job related to your major. OPT permits you to work in your field of study after completing your program, with possible extensions for STEM graduates.
Can I travel outside the U.S. on an F-1 visa?
Yes, but ensure your Form I-20 has a valid travel signature from your DSO and that your visa and passport are up-to-date before re-entering the U.S.
What happens if my F-1 visa is denied?
You can reapply by addressing the reasons for denial, such as providing stronger evidence of financial support or ties to your home country.
How do I maintain my F-1 visa status?
Stay enrolled full-time, report any changes to your DSO, and avoid working without proper authorization.
What is the 60-day grace period?
After completing your program, you have 60 days to depart the U.S., transfer to another school, or change your visa status.
Can I transfer schools on an F-1 visa?
Yes, notify your current DSO, get accepted to the new school, and ensure your SEVIS record is transferred before starting classes.
What is the STEM OPT extension?
STEM graduates can extend their OPT for an additional 24 months if they work for an employer enrolled in the E-Verify program.
How do I apply for an F-1 visa extension?
Apply before your current visa expires by submitting Form I-539, along with supporting documents, to USCIS.